October 13, 2017
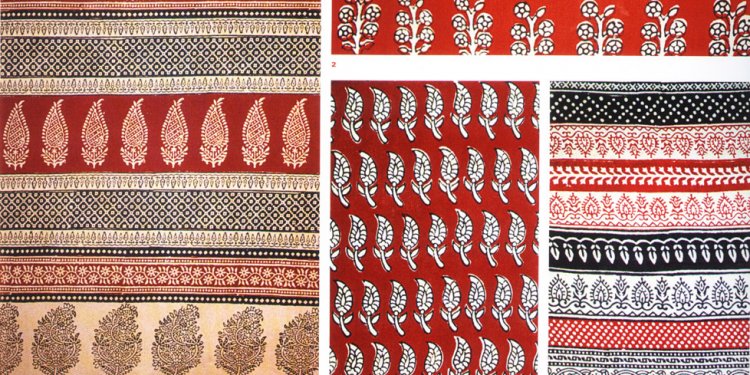
What does block printing means?
Steps
Method 1
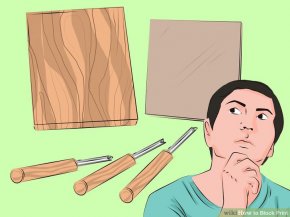
Block Printing With Wood or Linoleum- Choose your material. It takes a great deal of care and a set of specialized tools to carve print blocks from wood or linoleum. Most craft and artist supply stores will sell starter kits specially suited to one block printing technique or another. Both wood and linoleum print blocks can hold enough surface detail to use quality printers’ ink, but they will work with paint as well.
- Traditional block printing uses carved wooden blocks or “woodcuts.” Wooden blocks make beautiful and durable printing blocks for use with the highest quality printmaking inks. However, because these blocks are carved directly out of the wood, they can require expensive tools and a knowledge of woodworking.
- A “linocut” is a printing block made of carved linoleum, typically a layer of linoleum fixed to a block of wood. Linoleum print blocks are durable and hold a great amount of surface detail, and they can be much softer than wood, which makes them easier to carve for beginners. However, producing a linocut also requires a set of specialized tools.
- Draw the design you want to create on a piece of paper. Keep in mind that you will be carving into the printing block to make a relief image, which means the lines you draw become the negative space of the finished design. Also, because a printing block works like a stamp, you want to draw the design backwards, a mirror-image of the final print.
- Some image editing software can "invert" your design, switching the black to white and vice versa. This can help you visualize the final design better.
- The same software can also “flip” or “mirror” images for you. If you have trouble drawing letters or images backwards, this software can help tremendously.
- If you feel comfortable using acetone to transfer your design onto the block, you can draw your design on a piece of paper in ink without “flipping” it backwards.
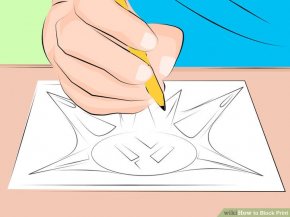 The acetone will bleed the ink from the top side of the paper onto the wood or linoleum in reverse, resulting in the correct orientation when it comes time for printmaking.
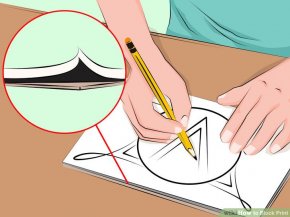
- Transfer your design onto the block you will be carving. Tape a piece of transfer paper directly onto the block with the shaded side of the page against the surface of the block. Then tape or clamp your design over the lighter side of the transfer paper. Using a pen or stylus, trace your design entirely.
- The ink on the back of the transfer paper will leave a “carbon copy” of your design on the surface of the block.
- If you are using acetone, place your inked design face-down on the linoleum or wooden block itself and brush over the paper lightly with acetone. The ink will bleed off the page and leave a reversed impression on the surface of your block. Presto!
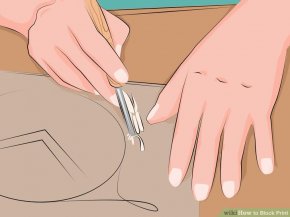
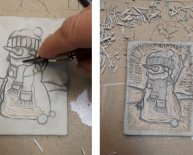
- Carve your design into the surface of the printing block. This is easier said than done, and an elaborate carving can take many hours, even days or weeks.
- Linoleum and wood carving tools look similar to the tools used for sculpting clay but will have much sharper edges. Never pull blades or sharp tools towards your fingers or body!
- Remember that you are carving the image in relief. The surface of the block will carry the ink, which means any cuts or lines you make will show up as negative space on the paper or fabric.
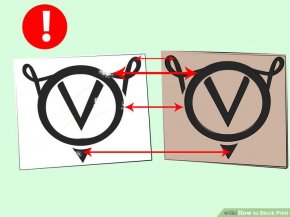
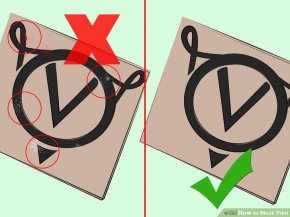
- Proof your printing block by making several test prints.
 Make initial prints on practice paper to fix details and find any imperfections in the carving. It will take patience to carve a block that produces a finished print just like your original design.
- Keep in mind that you can always carve more out of your block, but it is just about impossible to put material back on! Move slowly.
- Prepare the block for printing. Whether you are using a new block or an old favorite, remove all dust, debris, and dried ink or paint from the surface of your printing block before each use. Unwanted particles will show up on the print and mar the design.
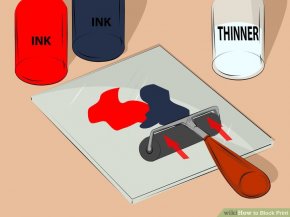
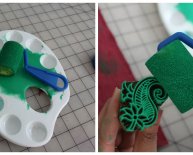
- Prepare the ink you will be using. Printers’ ink is sticky and much thicker than the more common ink used in fountain pens. It also dries very quickly. Using a brayer (ink roller), mix the ink on a glass plate according to any listed instructions to get the consistency right for printmaking.
- It might take additive thinners or other chemicals to keep the ink from drying too quickly.
- If you are printing onto fabric, oil-based ink is recommended. Oil-based inks can take up to four days to dry and must be cleaned with mineral spirits to keep your wood or linoleum block usable.
- Oil-based inks will stain clothes and surfaces so prep your work area carefully.
- Coat the surface of the block with a thin layer of ink. After getting the ink to the right consistency, use the brayer to spread the ink evenly over your carved printing block.
 The ink will be tacky enough to avoid running into the lines and recesses etched into the block.
- Practice on test paper to perfect how much ink you need to use for each print.
- Professional printmakers will often make separate blocks for each color to be used in a professional design.
- If you are using paint, you will be tempted to simply brush the surface of the block with paint, but be careful to maintain any surface details essential to the design.
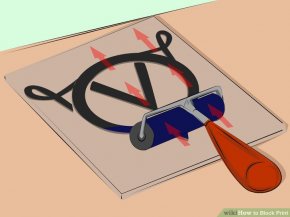
- Press the paper or fabric over the block. Use a baren (printmakers’ rubbing tool) or a similar utensil, such as a wooden spoon, to press slowly and evenly over the back of the paper. Ensure good contact between the carved surface of the block and your medium. Peel the material off the block carefully to avoid smudging.
- Reapply ink between each printing to ensure the best quality products.
- Depending on the size of your materials, you may want to clamp the block in place before making prints. Professional printmakers have sophisticated presses that hold the print medium in place against the block.
- Do not let the paper or fabric move at all! Any side-to-side motion will smear the ink across the surface.
- Smaller blocks can be “stamped” directly onto paper or fabric. Press straight down and pull straight up.
-
10
Let the print dry properly. Different combinations of pigment and printing media will dry differently, and printmakers’ ink can take several days to dry.- Hanging prints to dry keeps them out of the way and safe during the long drying process.
-
11
Clean your print block and tools thoroughly. Keeping your tools and printing blocks clean is the best way to ensure they last a long time and continue to function properly.- Water-soluble inks can be washed with soap and water.
- If you are using acrylic paint, wash wooden blocks immediately to stop the plastic from warping the wood as it dries.
- Use mineral spirits to clean linoleum and wood blocks used with oil-based inks.
Share this article
Related Posts
Latest Posts


