
Stretch and sew Elastic
 This post is part of the Stretch Yourself series, hosted by Miriam of Mad Mim and Miranda of One Little Minute. It is a two week long series about sewing with knits that have started last week, covering various topics like fabric selection, pattern-making, construction, finishing techniques with various style and projects by 10 guest bloggers.
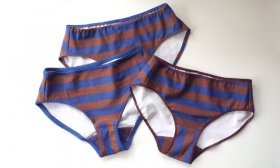
My tutorial is for sewing your own panties, but most especially about using and attaching several types of elastics. Sewing your own panties is fast and easy, really it is much more faster than reading this whole tutorial. You don’t need too much fabric, and can even recycle fabric from old T-shirts. With imaginations, you can have a drawer full of pretty and colorful panties in no time!
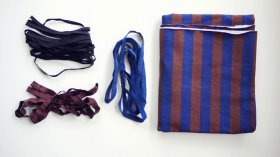
- Stretch fabric: lycra, jersey. The amount will depend on your size, but usually about 0.5 m is enough. Old T-shirts can also be used!
- 4-7 mm width elastic, about 1.5-2 m for each panties. I usually use the plush picot edge elastic, it has one soft side that will make it comfortable against the skin. I will also show how to use foldover elastic and regular elastic.
- No serger needed! An ordinary sewing machine that can sew straight stitch, zigzag stitch, and 3 step zigzag stitch (optional) is all you need. Use ballpoint sewing machine needle for sewing jersey/stretch as regular sewing needle can be too sharp and damage the fabric.
- And of course, a pattern. There are many free panties pattern available on the net, here is some of them:
You can also trace them yourself from the ones you already have. Cut the panties on the seamline and trace them on paper. Then add 6 mm (1/4″) seam allowance to all pattern pieces.
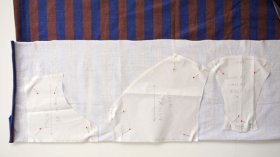
- For most pattern, you will have three pieces, front, back, and crotch.
- Fold your fabric and place your pattern pieces. Pay careful attention to the grainline marks.
 The finished panties will be twisted if the grainline is off.
- You will usually have 1 front piece, 1 back piece and 2 crotch pieces (one is for crotch lining).
- If your fabric is lycra, use cotton jersey for the crotch lining because it is more comfortable. I usually cut old T-shirts for this purpose.
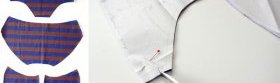
- Transfer the pattern markings to the fabric. You can use fabric marker, but some tiny snips are usually enough.
- You can use straight stitch to sew the panties, but I prefer to use zigzag stitch to maintain the stretchiness of the fabric. When using straight stitches, sometimes the stitches might ‘pop’ when the fabric is stretched.
- I usually set my zigzag stitch on 2.5 in width and 1.5-2 in length.
- Stretch the fabric slightly when sewing, matching the edges. You don’t need to use too many pins.
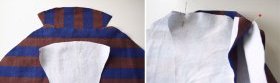
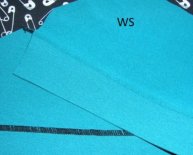
- Sandwich the back piece between two crotch pieces, matching all the stitching marks. Pay attention to the fabric sides. Both right sides of the crotch piece should be against the back piece. Hold the layers with pins.
- Stitch the sandwiched layers together using zigzag stitches.
 Hold the fabric and stretch them slightly with your fingers to nudge the edges together.
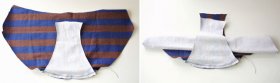
- Roll the back piece between the two crotch pieces.
- Sandwich the front piece between crotch piece and crotch lining, again while paying attention to the fabric sides. Stitch these layers together as before.
- Turn the crotch inside out. Voila! All crotch seams are hidden inside!
- Sew each side seams of the panties. It’s time to sew the elastics!
Picot edge elastic has one picoted edge and one straight side. The picot edge will look very pretty peeking a bit around the waist and leg openings. Some of them has plush side to make it comfortable against the skin.
- Measure the waistline of the panties and cut your elastic about 15-20% shorter than the measurement. Add 1 cm (5/8″) allowance before you cut.
- You can also measure the elastic by placing it around your waist comfortably.
- Mark the center point of the elastic with pin or fabric marker, also mark the center back and front of the waist.
- Starting on the center back, place the elastic on the right side of the fabric, Line the straight edge (non picoted) of the elastic against the edge of fabric. Pin the center of elastic to the center front.
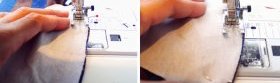
- Sew the elastic using zigzag stitch, making it as close as possible to the picoted edge.
- When sewing elastic to the fabric, you should stretch ONLY the elastic and not the fabric.
- I don’t use other pins other than the two above and only do the stretch-hold-sew. Stretch the elastic slightly, put your thumb down to hold it in place, and sew. Repeat until you reach the center back again.
- Overlap the end of elastic by 1 cm.
- If necessary, trim the seam allowance to reduce bulk.
Share this article
Related Posts

Latest Posts


