
Printing on freezer paper
 Creative people like to do things NOW. Not later. Not when you go get the supplies, gather them all up and wait...but now. Which is why I have a lot of supplies sitting around in my stash. Because you never know when you will NEED to make something right now, because you just have to.
Freezer paper is one of those things that you need to keep handy.
It's cheap and useful for lots of things and helps a lot with the "do it now" factor that I was talking about.
Case in point...sign making.
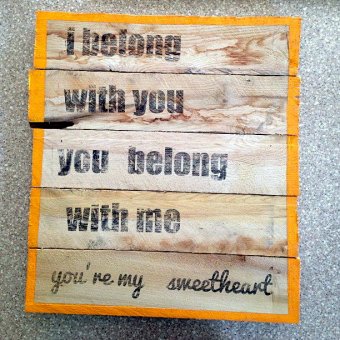
I'm in the process of redoing the boys bathroom and wanted something like this (see above) to hang in there.
Plus, I'll be working on a HUGE project for my church soon and I needed a way to transfer A LOT of letters and tracing and painting in was not going to cut it.
 Time to learn how to use the freezer paper method.
I did. And now I'm a believer.
Want to learn?
You will need:
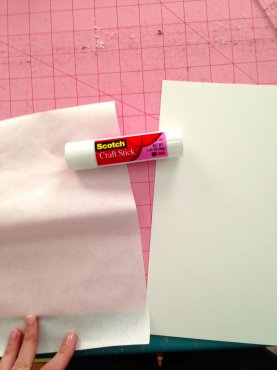
cardstock
gluestick
ink jet printer
wood to transfer onto
metal spoon
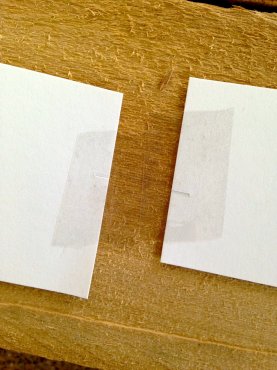
Lightly go over your cardstock with your glue stick. Pay close attention to the edges, especially the edge where your paper will feed into your printer. Glue as close to the edges as possible.
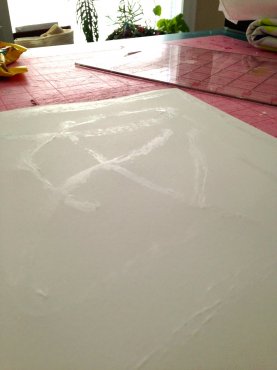 Lay your freezer paper ON TOP of the glue WAXY SIDE UP. Smooth down. Tape down any edges that do not want to lay flat and "be at one" with your cardstock. Again, pay special attention to the edge that will feed into the machine first.
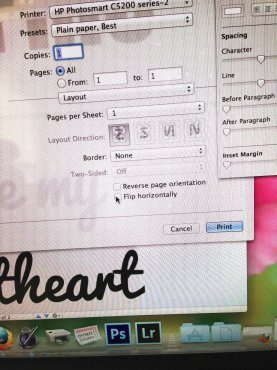
This works best if you print "best quality". Place your created freezer paper/cardstock in your printer paying attention to how your printer feeds the paper in...you want to print on the waxy side.
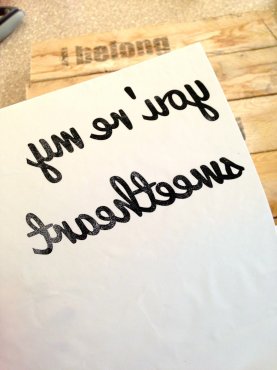
Now print. Your result will be this...your words printed onto wax.The ink will be WET so do NOT TOUCH it.
It may take a time or two trying to figure out the method but it will work.
I think I did it five times before I got it right.

Share this article
Related Posts

Latest Posts


